Help Using Shmoop
MoreHow do I customize my course content?
You've heard about our Custom Classes option, and now you want to make it happen? Here's how.
Step 1
Click on your username in the top right of the screen (or the top of the view on mobile).

Step 2
Choose "Create a Classroom" on your Dashboard.

Step 3
Name your classroom. (Don't worry—you can always change it later.)

Step 4
Select your license. If you're working within a school or district license, be sure to choose that sucker. If you're on an individual subscription, choose "Individual Access."

Step 5
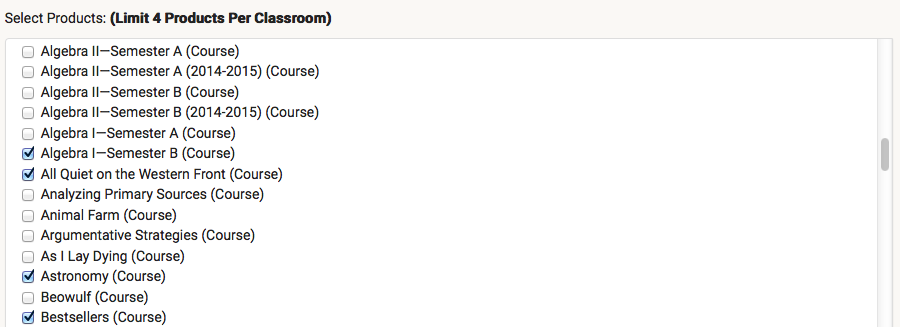
Choose which courses you want to add to your classroom. You can choose up to four, and remember, they have to be courses—test prep need not apply. (Not even test prep courses can sneak in.)
Step 6
Click "Create Classroom."

Step 7
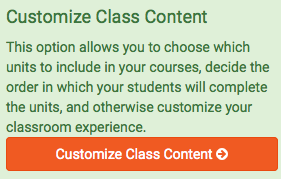
Choose "Customize Class Content."
(Click okay when our handy warning pops up. We're just reminding you that student progress made in the classroom you're creating will only be viewable in that classroom and in that classroom's gradebook.)
Not to confuse you, but now that we've made it to the actual meat of the process, we're going to revert back to STEP 1, just so we're following the 5 steps in the process. So, without further ado:
Class Schedule Maker
Step 1/5:
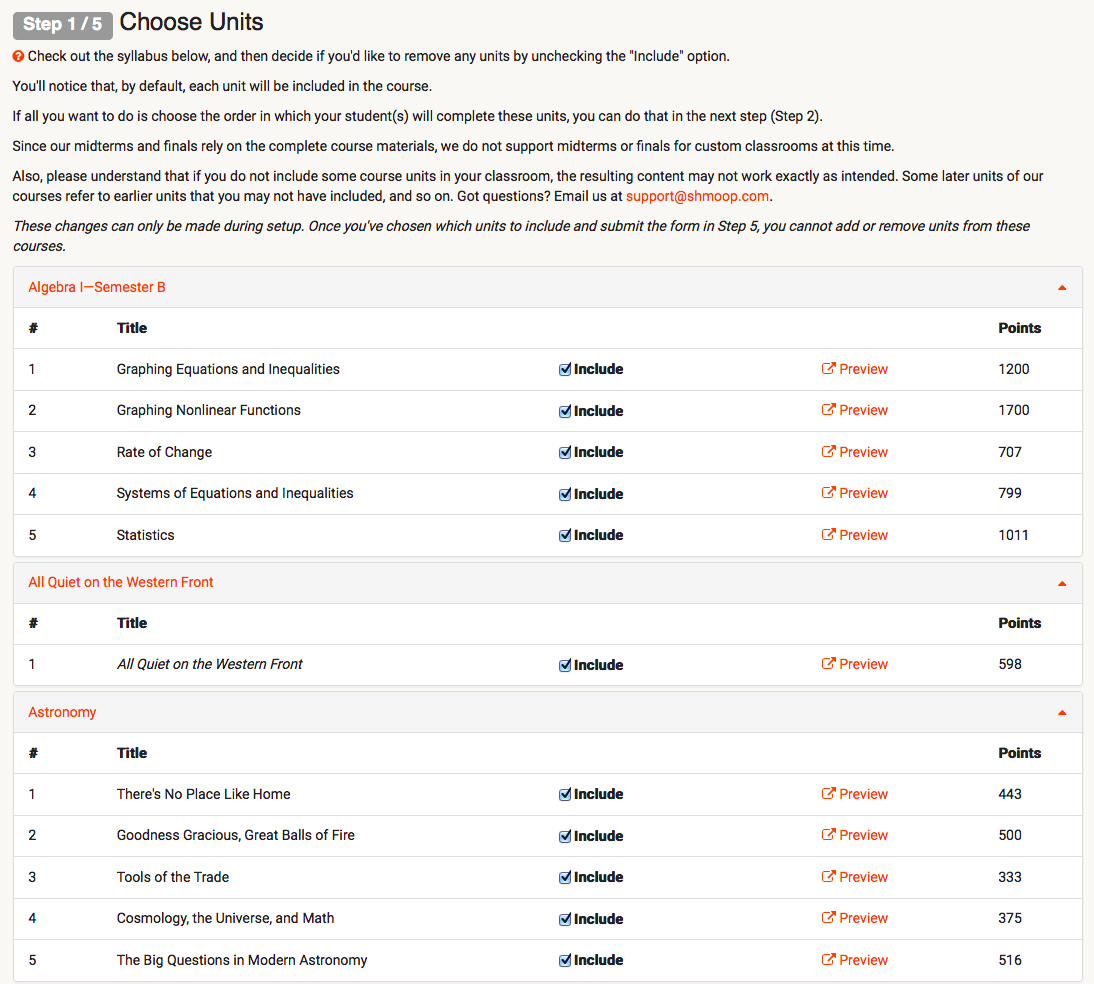
Here's where you'll decide which units you want to include in your customized course. Every unit is included by default, so if you see anything you don't like, just uncheck the box next to the word "include." Not sure what content is in which unit? Just click that "Preview" button, and you'll be brought to the course content, where you can peruse to your heart's content.
Once you feel good about your choices (do we ever?), click "Continue" and then "Confirm" to move on.
Step 2/5:
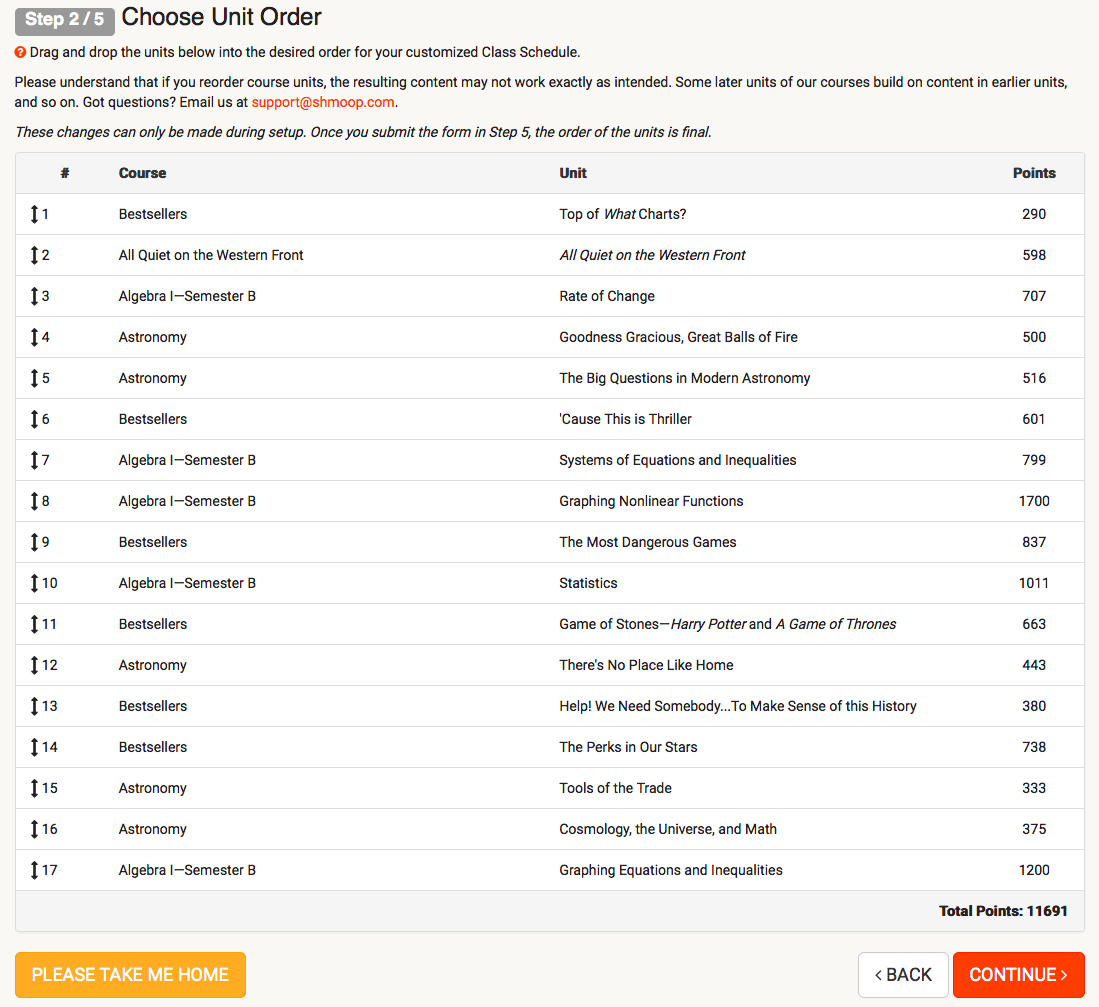
Now you'll decide the order you want for your units. You can put them in any order you want—mixing and matching units from the various courses included in your classroom. Just drag 'n' drop until the units are in the order you want 'em in. When you're done, click "Continue" and then "Confirm" to move on.
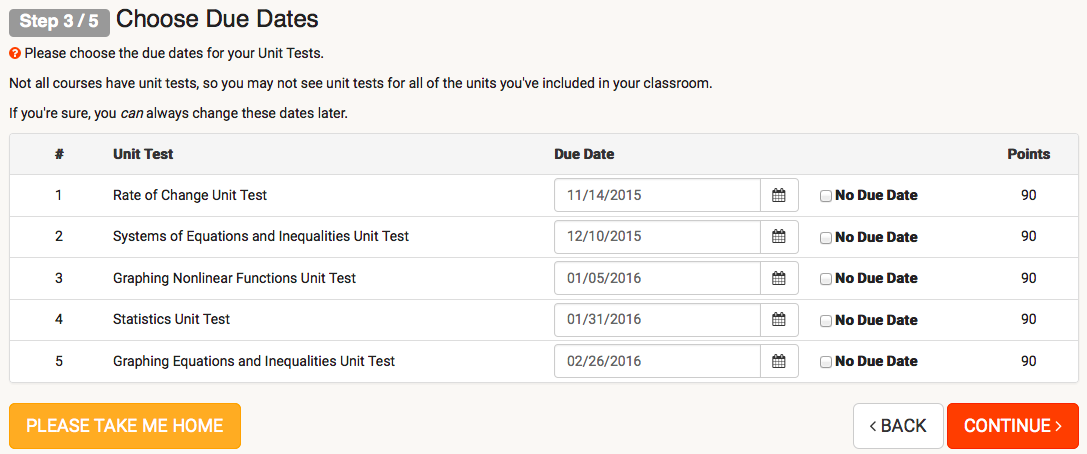
Step 3/5:
If there are any unit tests in the courses you've chosen, here's where you'll choose the due dates for the exams. Don't stress: unlike the units and the order of the units, these options can always be changed down the road. You can also just choose "No Due Date" if you're not sure. When you're done, click "Continue" and then "Confirm" to move on.
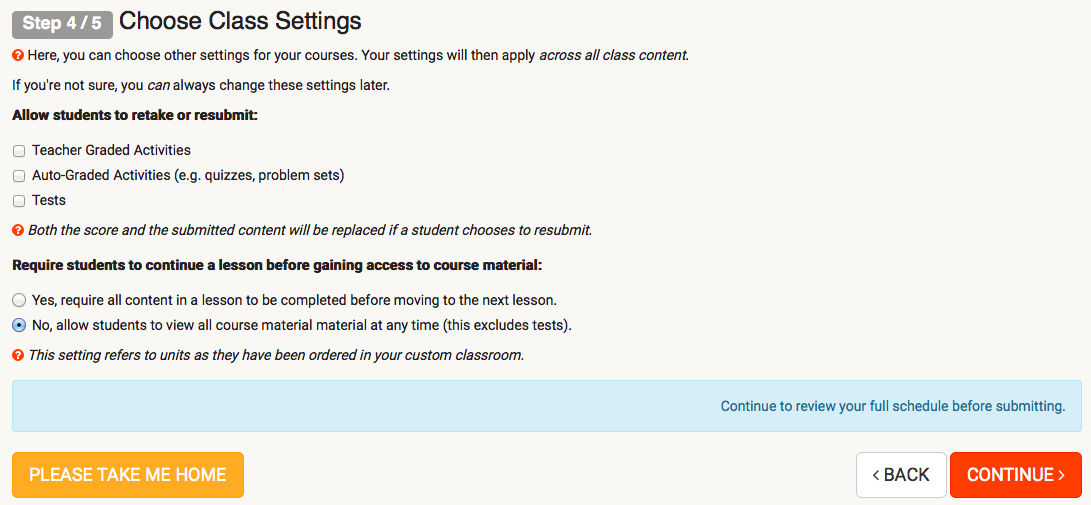
Step 4/5:
In this step, you'll tweak some other class settings. These ones can also be changed later on, so if you're not 100% sure, don't sweat it. When you're done, click "Continue" and "Confirm" to move on.
Step 5/5:
Review everything, and if it looks good, click "Submit Form." Make sure you're totally sold on the units you've included and the order you've put 'em in, because once you click submit, there's no turning back.

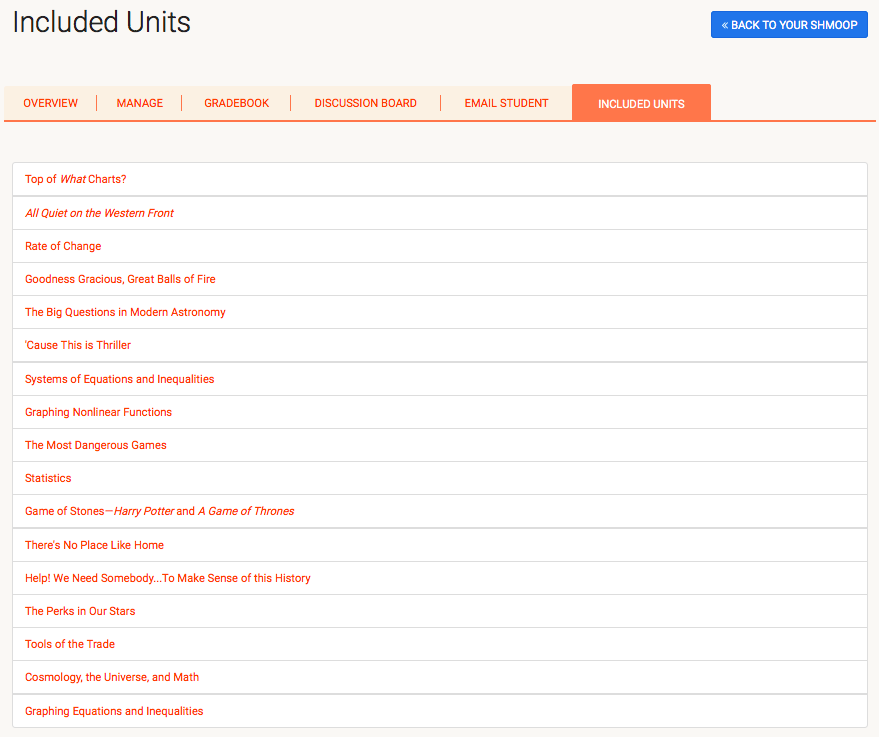
Once you've submitted the form, you'll be brought to the overview page of your classroom. Here, you can go directly to the course you've created…

...or view the units in the order you put them in by clicking the "Included Units" tab.
Still need more help? Feel free to email support@shmoop.com, and you'll hear from a real human with 24 hours.