Help Using Shmoop
MoreHow do I create an assignment?
No one ever taught you how to teach Test Prep—but someone did teach Shmoop, and we're here to pay it forward. This article will walk you through the process of creating assignments within Test Prep products.
For now, this feature is only available for AP®, SAT®, ACT®, and CAHSEE prep, but we know you love it, so we're working on introducing it into other products.
Here's how it works, using ACT Exam Prep as an example.
Step 1:
Select or create a classroom containing the product you want to assign.
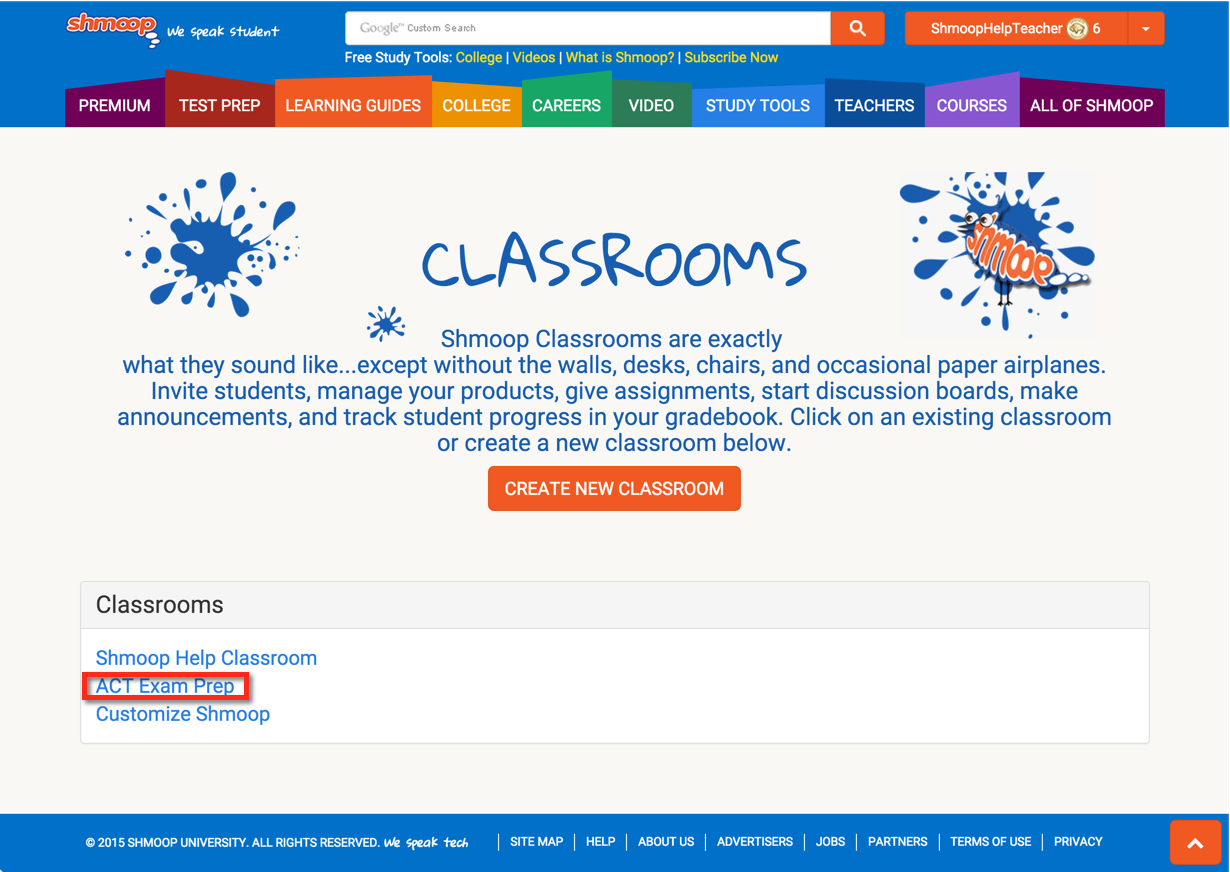
Step 2:
Click on the Assignments tab and select the prep topic.
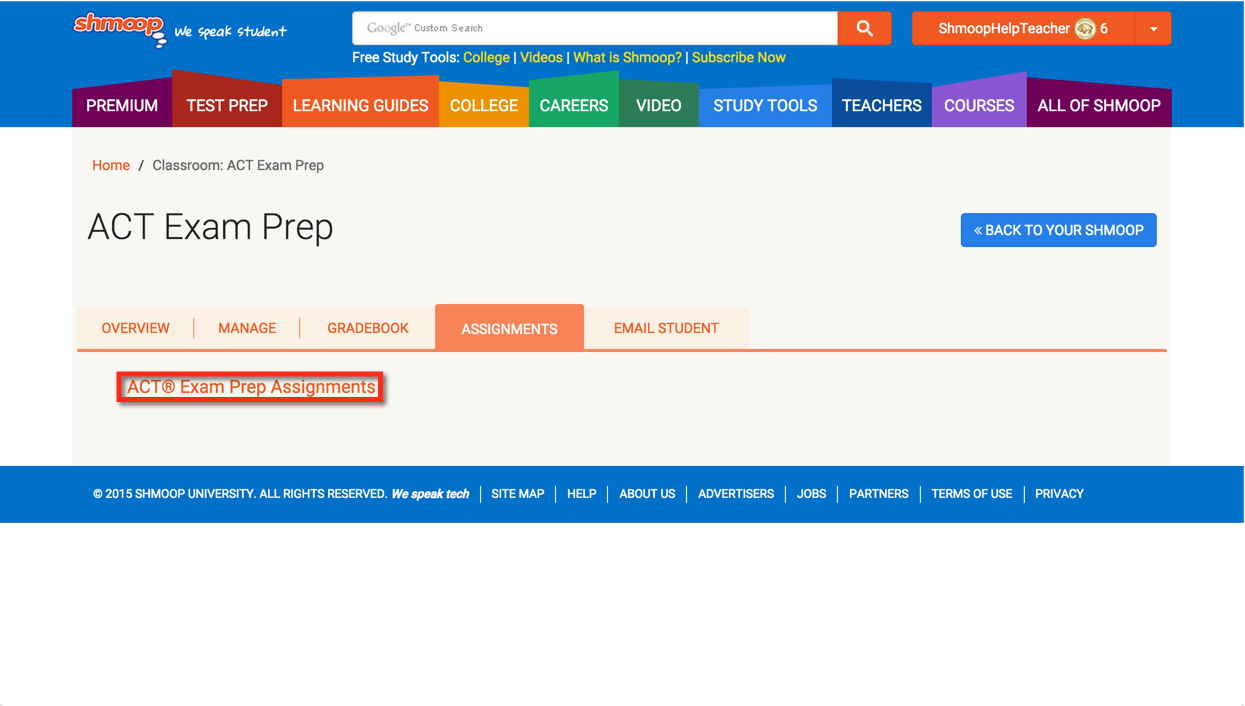
Step 3:
In the assignment library, click Create Assignment.
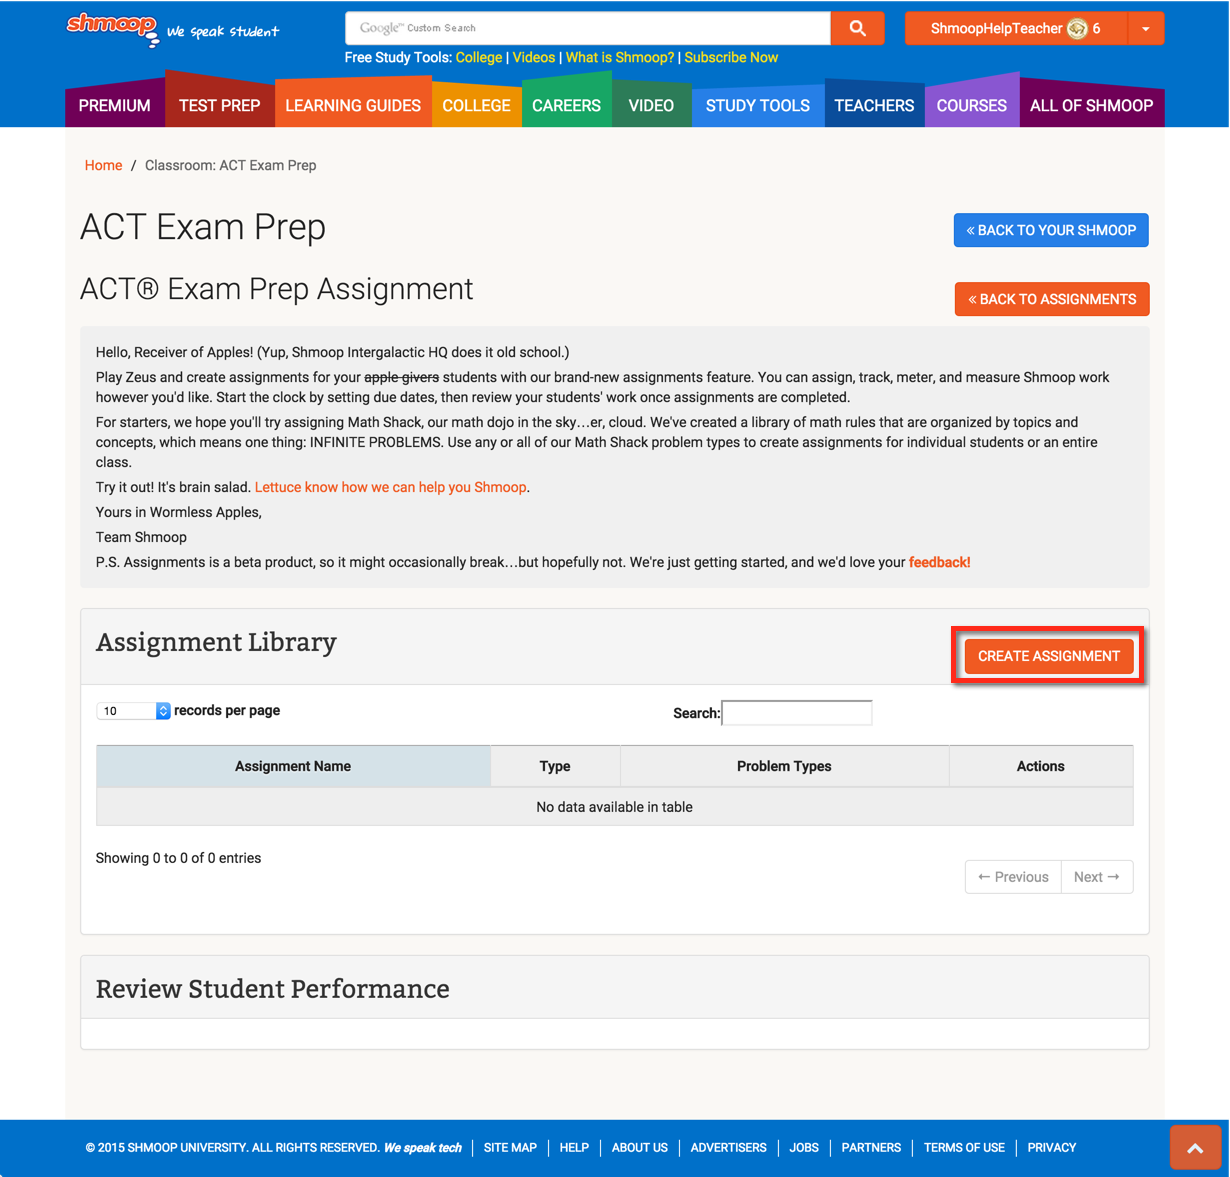
Step 4:
Choose the type of assignment you want to give your students. If you're in an AP product, you'll only be able to assign a drill. In SAT, ACT, and CAHSEE, you can also assign Math Shack in the form of a Quiz or Mastery.
- A quiz tests knowledge of problem types. For each problem type, students must answer a set number of questions, and they have only one attempt to answer each question.
- Mastery-Based Learning is a teaching method premised on the idea that student progression through a course should be dependent on proficiency as opposed to amount of time spent on academic work. This feature allows students to use hints to help them learn concepts, to work at their own pace, and to ensure they have mastered concepts before moving on. (Note: if students have already mastered a problem, they will not have to do it again in this assignment.)
Once you've chosen, click "Next."
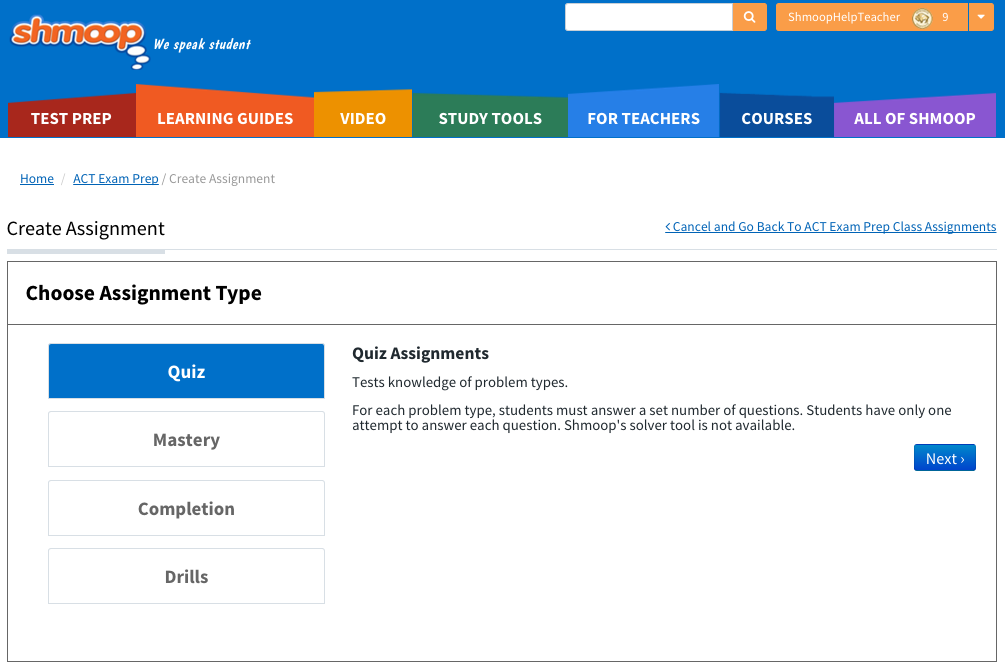
Step 5:
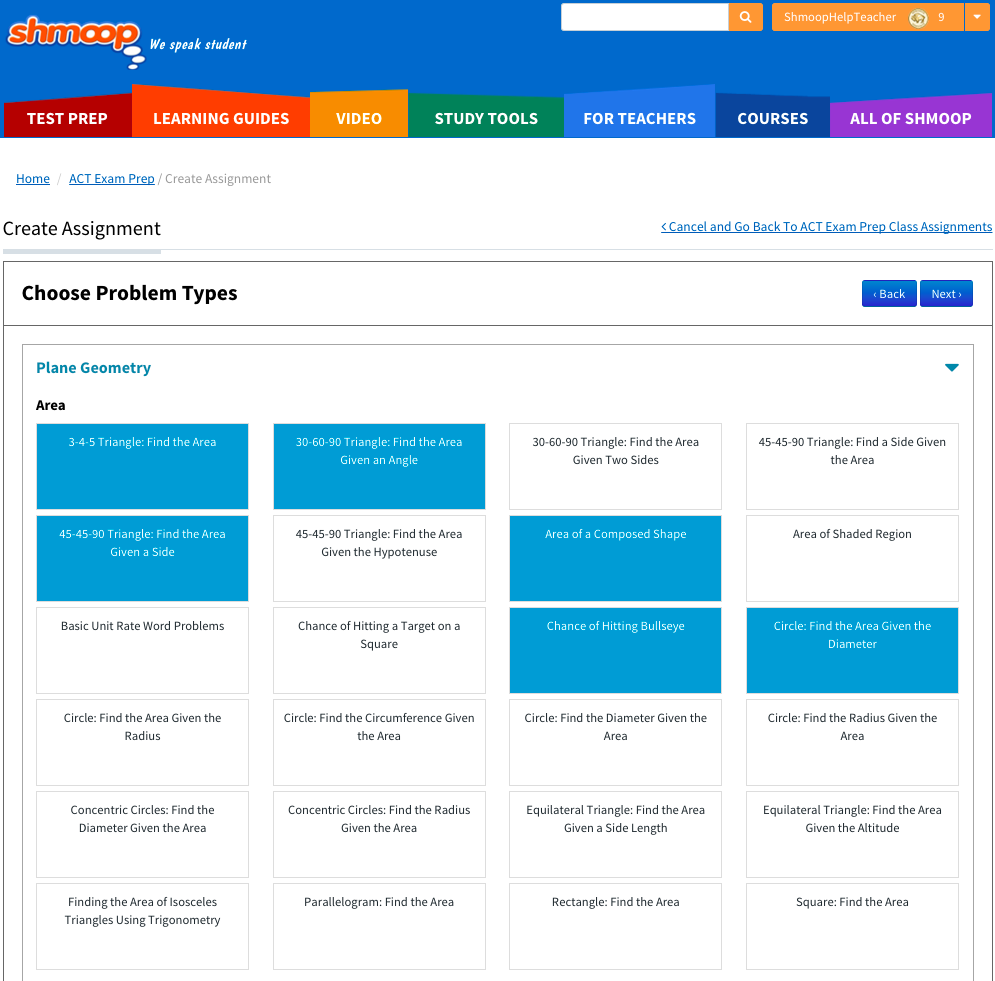
Choose problems by clicking into the problem type and then selecting the concept. The problem set you select will appear highlighted in blue. Once you've got your share of problem types, click "Next."
Step 6:
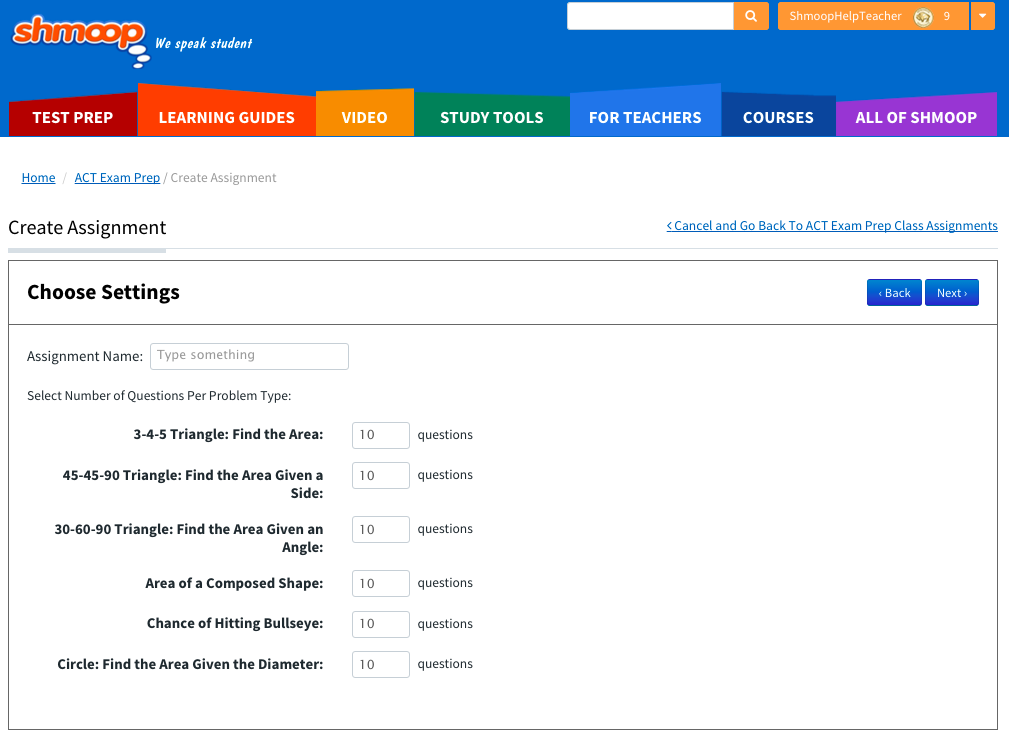
Your selected problem types will be listed on the next page. Name your assignment (sorry, Bob's taken), choose the number of questions you'd like for each problem type, and click "Next." Or, if you want to make changes, click "Back."
Step 7:
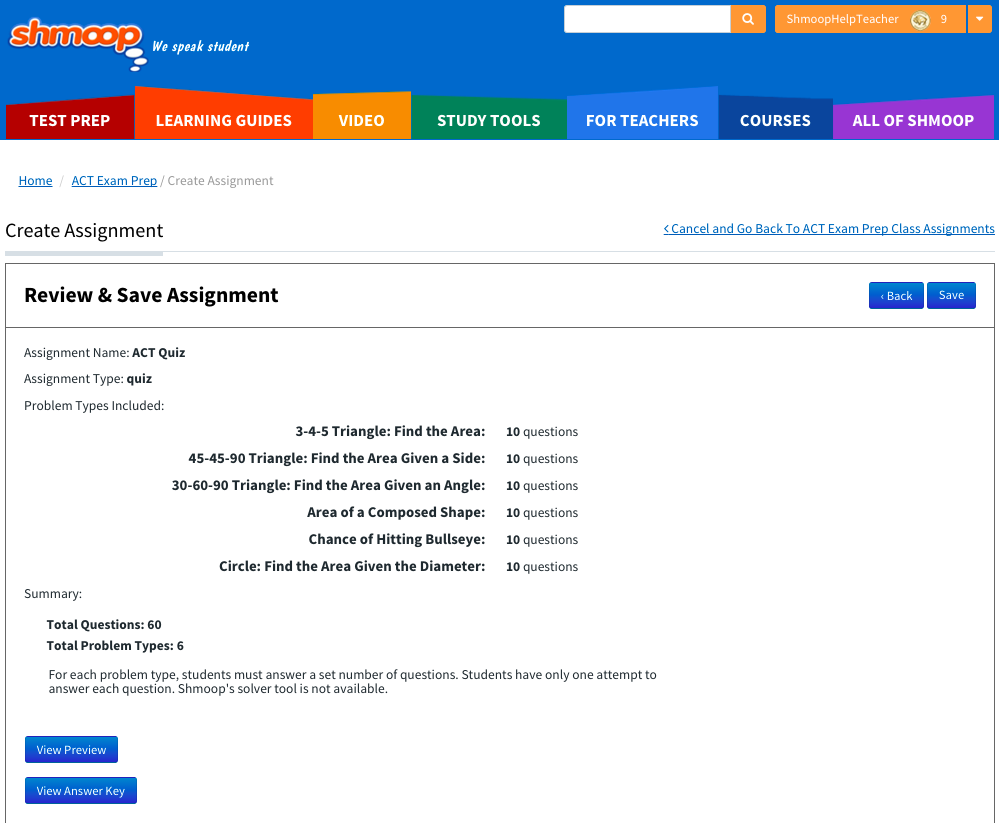
Review your work, and to complete the process, click "Save." (Or, if you had any oops moments, click "Back.") Be warned: once you click Save, your assignment will be created and you won't be able to make changes.
Step 8:
Once your drill is created, you'll see it in your assignment library. From there, you can view the details of the drill and send it to students.
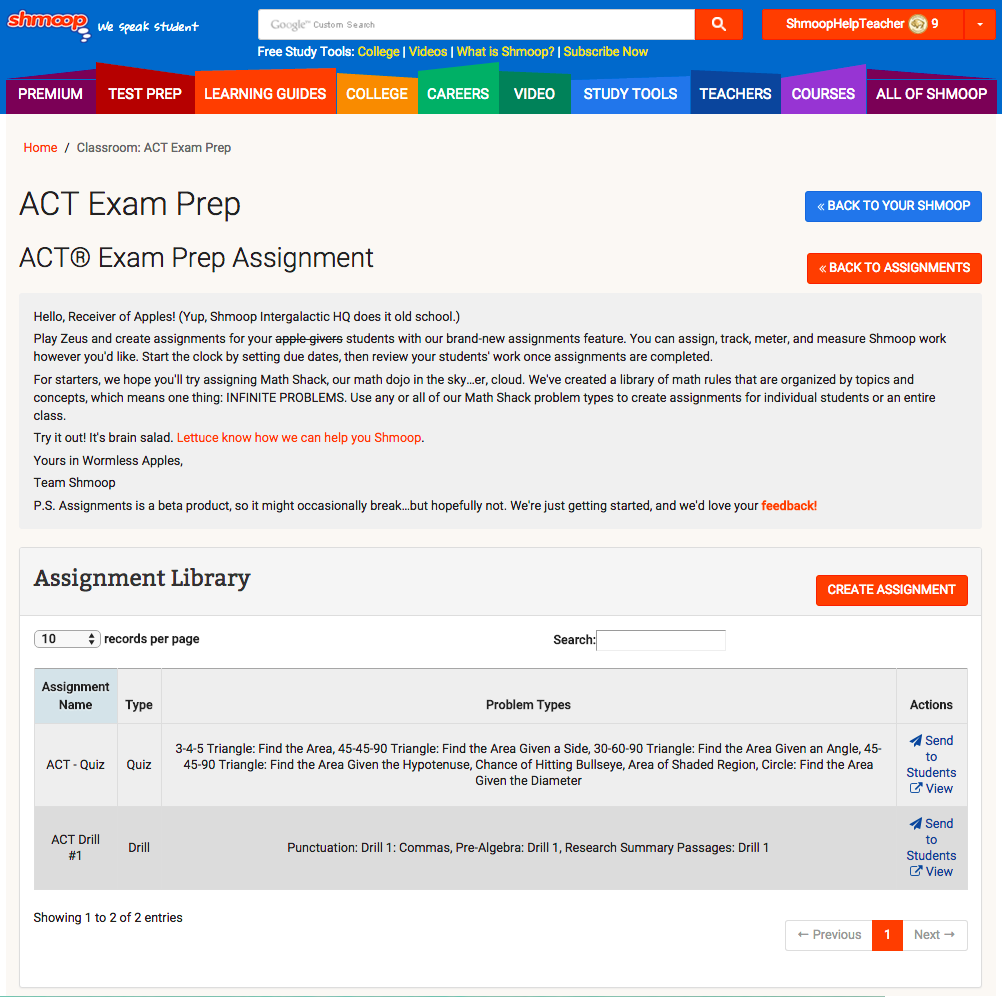
To view the questions within each drill, click—you guessed it—"View."
To send the assignment to your students, click "Send To Students" from the assignment library. You can select a due date, or, if you're everyone's favorite teacher, you can choose not to have a due date. Then, select the students you want to send the assignment to—or choose to send it to your entire class.
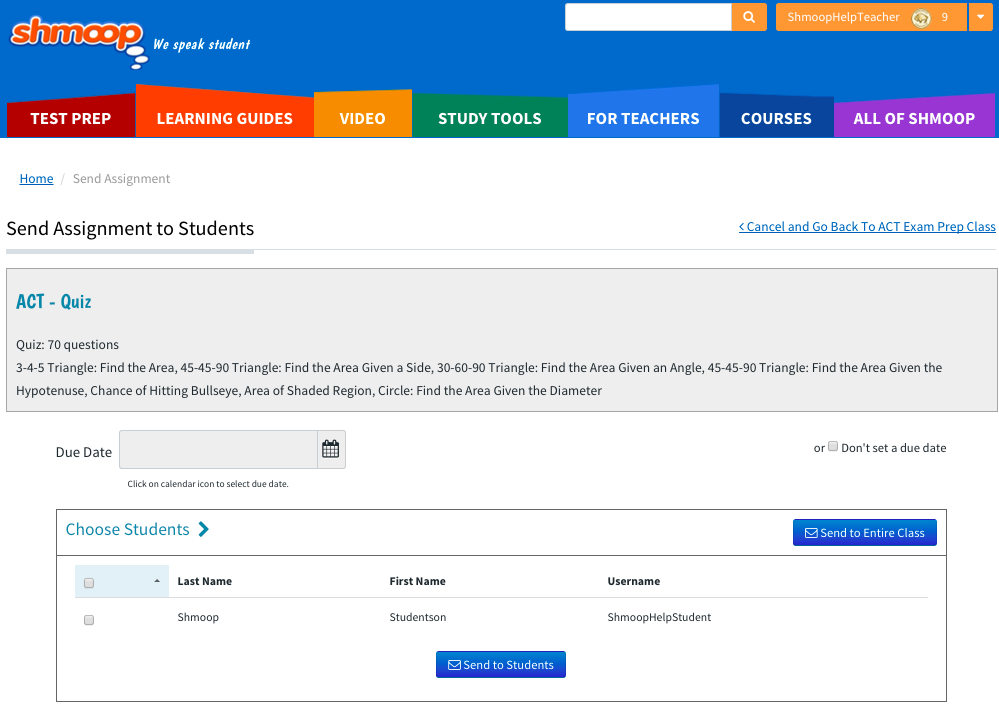
Click "Send to Students" or "Send to Entire Class," and...that's that.
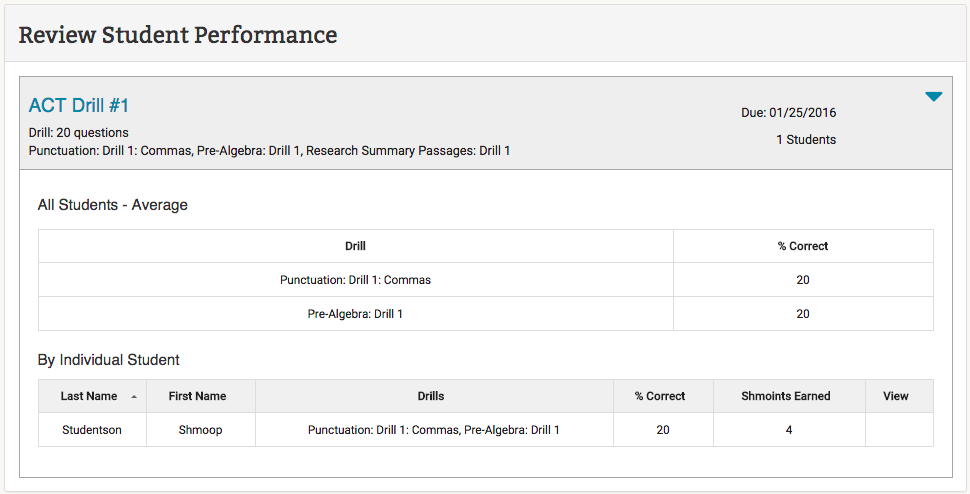
P.S. You can view your students' progress right below your assignment library.
Still need more help? Feel free to email support@shmoop.com, and you'll hear from a real human with 24 hours.